

MThis blog is reader supported, and some of the links in this post are affiliate links, meaning, at no additional cost to you, I will earn a commission if you click through and make a purchase. As an Amazon Associate I earn from qualifying purchases.
Welcome to another heartwarming journey of creativity and tradition!
As we approach Easter, there’s something truly special about infusing our celebrations with handmade treasures.
Today, I’m excited to guide you through the enchanting process of crafting Waldorf-inspired wet felted Easter eggs using plastic eggs and wool roving.
Wet felting is a technique used to create fabric from wool fibers by using hot water, soap, and agitation.
It is one of our absolute favorite homeschool Easter activities!
You can use this technique to make beautiful felted Easter eggs with your children to celebrate Easter or simply to celebrate springtime.
It’s such a wonderful and sensory-rich craft for kids of all ages. The wool roving is so soft, and it comes in such gorgeous colors…plus, playing with warm, soapy water is so enjoyable for kids!
It is also a very soothing, meditative process that helps to slow everyone down and become more present.
And even toddlers can participate with just a little help from an adult!
Just be sure to have plenty of towels under your basins of water, and extra ones handy to wipe up all the water spills.
While I do recommend using plastic Easter eggs for this activity, I don’t love plastic, and it is possible to make wet felted eggs without them.
However it is a lot trickier for younger kids, and the plastic egg provides the perfect form for creating a nice egg shape for this Easter craft.
We have a whole bunch of plastic eggs that we collected at past Easter Egg hunts that our kids have participated in.
We have never actually had to purchase any new plastic eggs for this, and if you do have a collection of them like we do from past Easter’s, this can be a great way to up-cycle them.
Now, let’s your materials and let’s embark on this delightful crafting adventure together!
Materials:
• Wool roving in various colors
• Natural Dish Soap (we use this one from Method)
Note: Do not use Dawn or heavy-grease cutting dish soap! It prevents the wool from felting
• A basin of warm water
• A basin of cold water
• Plastic Easter eggs
• Towels
Instructions:
Prepare Your Workspace Create a cozy crafting space where you can immerse yourself in the joy of creating. Lay down towels to protect your work surface and have all your materials within reach. If you wish, infuse the air with the soothing aroma of organic essential oils to enhance your soothing crafting experience.
1. Begin by choosing a base color for your egg from your wool roving. You can use one color or several colors to create a marbled effect. Then, pull your wool roving gently apart by grasping each end and gently tugging on them until they come apart into strips long enough to wrap around your plastic egg.
2. Start wrapping the strips of wool roving around the plastic Easter egg, covering the entire surface.. Wrap the wool tightly around the egg, first over and around top to bottom, and then wrapping another layer around the circumference. Then repeat a couple of times until the egg is well covered.
3. Once your eggs are wrapped in wool roving, it’s time to bring them to life through wet felting!
Fill a bowl with hot soapy water (caution: it should be comfortable and not be hot enough to burn!), and gently submerge each wrapped egg. Allow the water and soap to penetrate the fibers. Add a little bit of soap directly to the egg to help it felt.
4. Begin to ever so gently pat and smooth the egg, while passing back and forth between your hands, rotating the egg as you go, applying more pressure as the wool begins to tighten around the egg. I cannot stress the importance of being as gentle as possible as you first begin to felt! If you apply too much force in the beginning you will likely end up with many wrinkles and cracks in your wool as you felt which are difficult to correct. With young children I recommend getting the egg started for them and passing it off to them once the egg has felted a bit and can handle more pressure. (See the video link below for more!)
5. Once your egg has felted enough, you can embellish it by wrapping thins strips of wool roving around the egg in a contrasting color, and felting them on using the same process.
When finished, pass the egg into the basin of cold water, then back to the hot a few times while patting and smoothing a bit more.
Lastly, rinse the egg in a basin of clean, cool water, then gently pat in a towel. Place the felted egg on the towel to dry.
Repeat the process to make as many felted Easter eggs as you’d like.

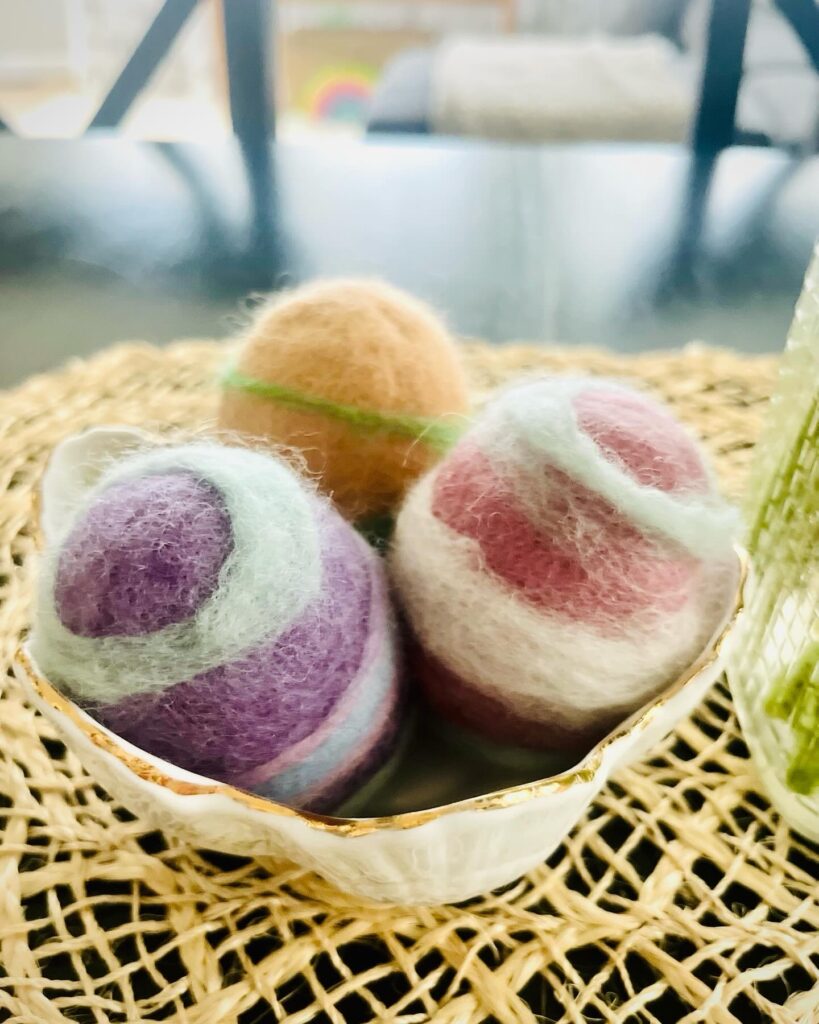
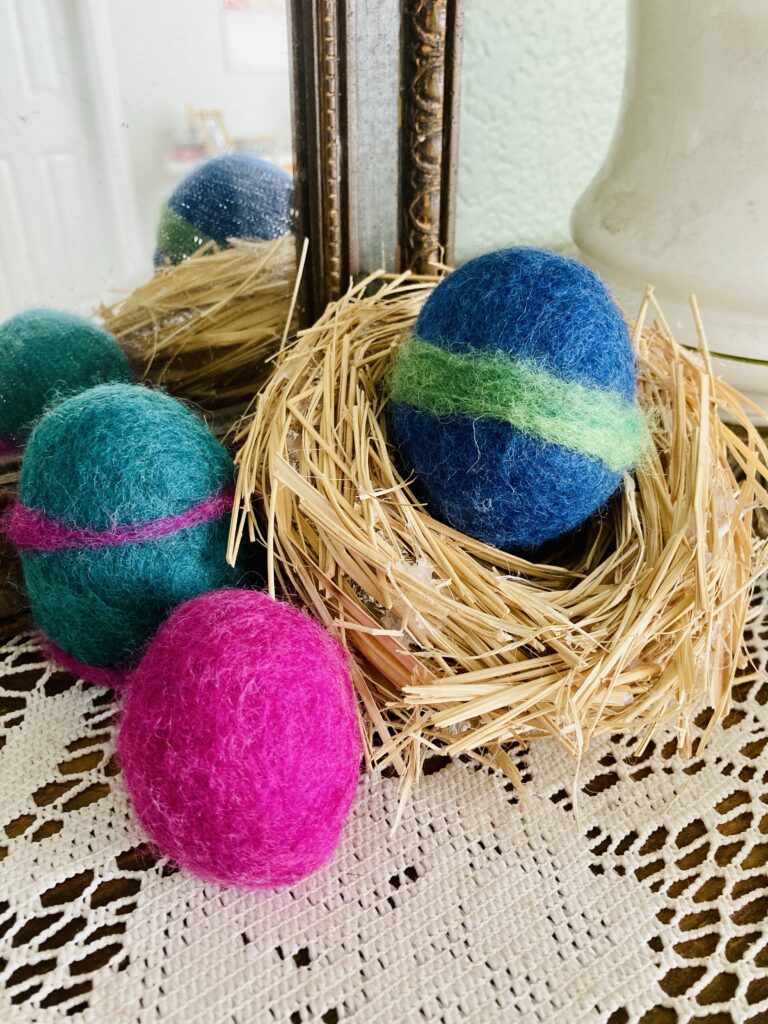
They make such a lovely and warm addition to any Easter basket or home decor!
We have used ours to embellish our Easter wreath for our front door as a secondary Easter craft project, as well as to decorate our Seasonal Nature Table.
This activity is part of our family’s Nourishing Seasonal Rhythm. Learn about seasonal rhythms and how to follow them here.
Lastly, here is a detailed video tutorial on how to make wet-felted Easter Eggs from the Bella Luna Toys blog that I found to be very helpful when we first learned how to wet-felt:
https://blog.bellalunatoys.com/2013/how-to-make-felted-easter-eggs.html
Crafting these Waldorf-inspired wet felted Easter eggs is not just a creative endeavor – it’s s nourishing journey that celebrates the beauty of handmade traditions as a grounding element in your seasonal rhythm.

Embrace the process, infuse each step with intention and love, and watch as your family’s creations become cherished symbols of the season.
Happy crafting, dear friends, and may your Easter be filled with warmth, joy, and creativity!
Did you try this craft? Let me know how it turned out in the comments!
One thought on “Nurturing Creativity: Crafting Waldorf-Inspired Wet Felted Easter Eggs”