This blog is reader supported, and some of the links in this post are affiliate links, meaning, at no additional cost to you, I will earn a commission if you click through and make a purchase. As an Amazon Associate I earn from qualifying purchases.
Welcome to a new journey of creativity and tradition!
As we eagerly anticipate the arrival of Easter, what better way to infuse our homes with warmth and joy than by crafting simple yet charming Easter ornaments?
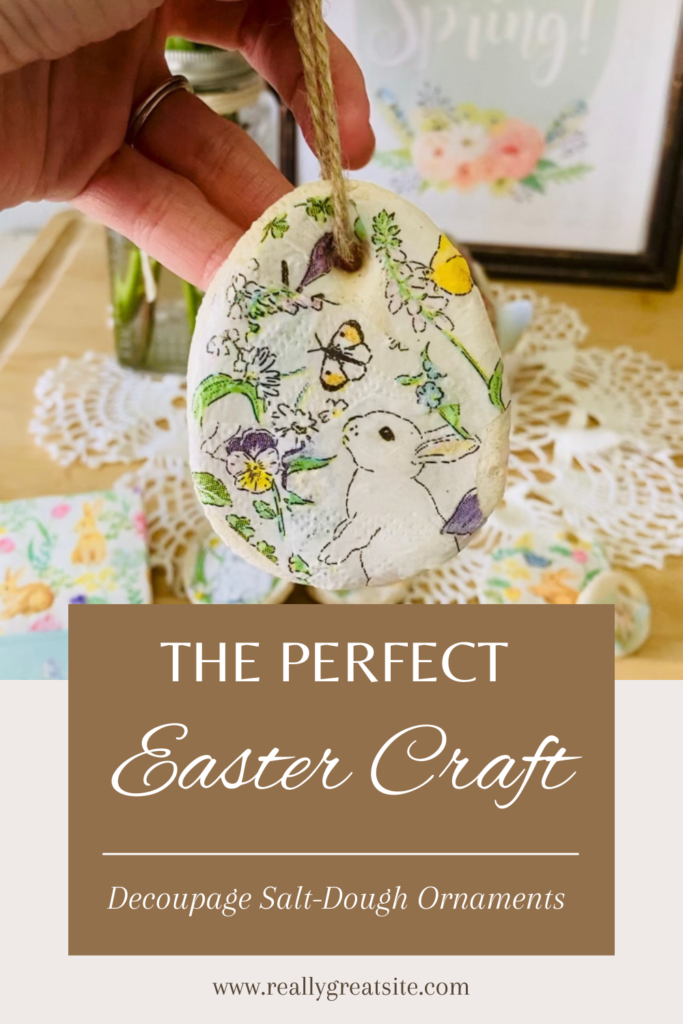
Today, I’m excited to share with you the magical process of creating decoupage salt dough Easter ornaments using just a few basic materials.
It is so easy and simple!
Decoupage is a technique used to artistically cover a surface with a pretty transparency and the. seal it.
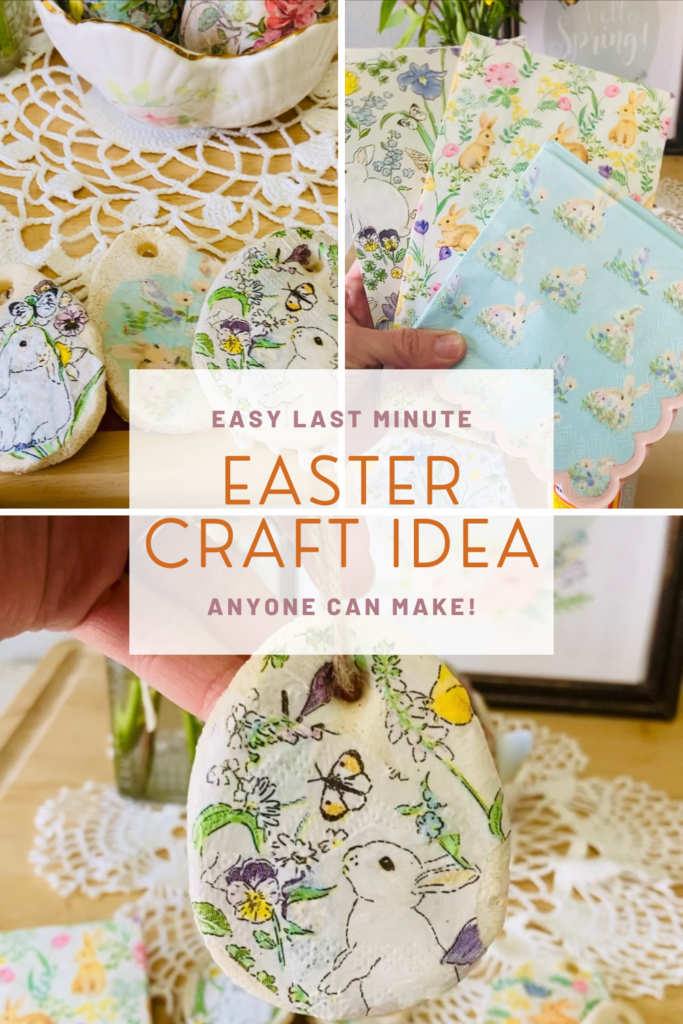
You can purchase special decoupage paper for this purpose if you wish, but one of the easiest and cheapest ways to decoupage is to use pretty paper napkins!
These decoupage salt dough Easter ornaments are so simple and easy to make, and so incredibly adorable.
They make a perfect gift for kids to give to their grandparents on Easter, or to hide in trees during an Easter Egg hunt as a little extra prize to find!
We’ve also used decoupage to decorate both real and wooden eggs as a fun variation. Just be very gentle when applying the napkin cut-outs to your surface, and pat them down lightly to smooth before coating with Mod Podge again to seal them.
Let’s dive in and unleash our creativity!
Materials:
-Basic Salt Dough (1 cup all purpose flour, 1/2 cup salt, and 1/2 cup water mixed together)
– Pretty napkins with Easter themed print. We got ours at Home Goods, but here are some pretty ones on Amazon:
Flower-pot and Easter Egg napkins
– Mod Podge
– Scissors
– old paint brushes to apply Mod Podge (rinse well when done!)
– Twine, ribbon, or yarn to make loop hangers for the ornaments
– chopstick or toothpick
Instructions:
Step 1: Prepare the Salt Dough
First things first, let’s whip up a batch of salt dough! Here’s a simple recipe:
- 2 cups all-purpose flour
- 1 cup salt
- 1 cup water
Mix the flour and salt together in a bowl, then gradually add the water until a smooth dough forms. Knead the dough on a floured surface until it’s soft and pliable. Your salt dough is now ready to be transformed into beautiful Easter ornaments!
Step 2: Roll and Cut Out Shapes
On a lightly floured surface, roll out the salt dough to your desired thickness.
Use egg or flower-shaped cookie cutters to cut out your Easter ornaments.
Don’t forget to make a small hole at the top of each ornament using a straw or skewer – this will be where you thread the twine or ribbon for hanging later.
Bake the ornaments at 250 degrees for 1-2 hours, until they have baked all the way through. Allow to cool completely before decorating.
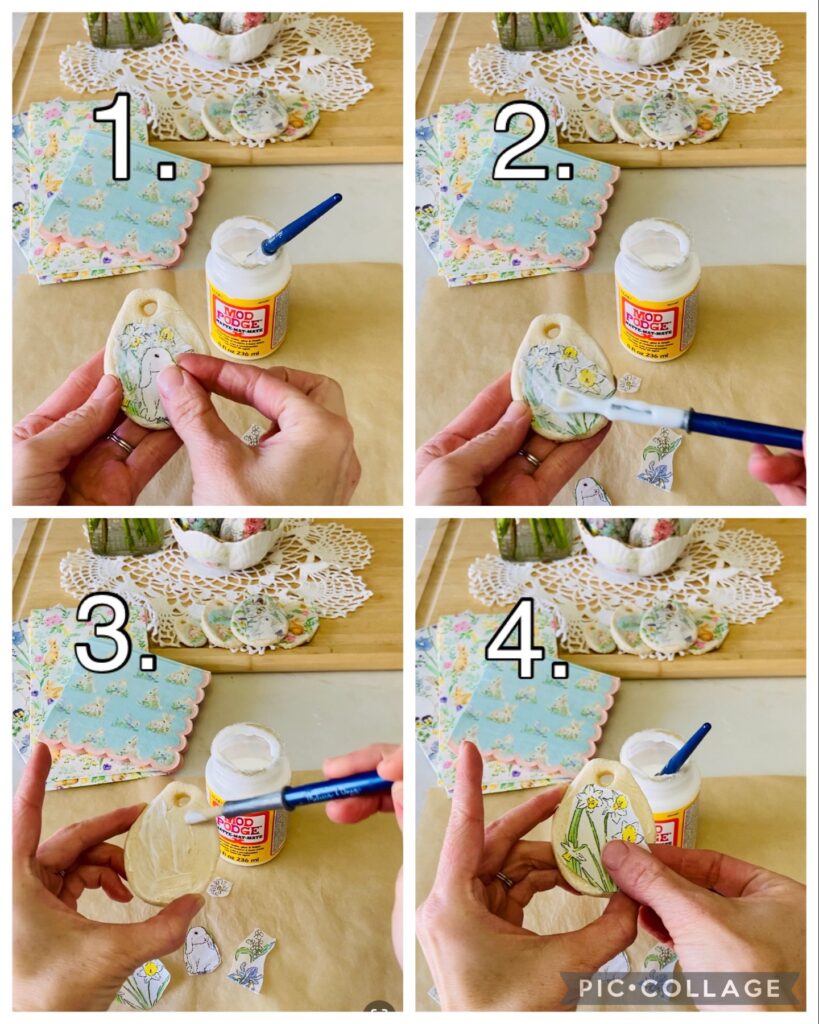
Step 3: Decoupage!
Peel the layers of backing off your napkins (there are usually two layers), so that you are left with just the thin printed layer. Cut out the prints into pieces that will easily fit onto your ornaments surface.
Cover the ornament with Mod Podge, and begin to place the cut-out napkin prints onto it, and arrange creatively in any manner you like.
Gently pat and smooth any air bubbles with your fingers as you go.
Step 4: Seal and Shine
Once your paper napkin cutouts are in place, seal the ornaments with another layer of Mod Podge. This will not only protect the delicate paper but also give your ornaments a beautiful glossy finish.
Allow the Mod Podge to dry completely.
Step 5: Add the Finishing Touch
Once your Easter ornaments are fully dry and adorned to your heart’s content, thread a piece of twine or ribbon through the hole at the top of each ornament for hanging.
Knot the ends securely, and voila – your handmade treasures are ready to be displayed with pride!
So easy, simple, and satisfying!
Crafting decoupage salt dough Easter ornaments is not just about creating beautiful decorations – it’s about infusing your home with warmth, joy, and a touch of handmade magic.
Embrace the process, let your creativity soar, and revel in the joy of crafting something truly special.
Happy crafting, my friends, and may your Easter be filled with love, laughter, and countless moments of creative inspiration!
Did you try this craft? Let me know how your ornaments turned out in the comments!